Pages

Monday, 30 December 2013

"I'm not sending Christmas cards this year..."

I like sending Christmas cards.

No, start again. I like making Christmas cards and sending them to friends and family, a little note p say thanks for being there for us over the year - a subtle but clear indication that you value your friendship with them.

I make the same design card for everyone and vary the greeting on the front.

When people announce that they aren't sending Christmas cards but "giving money to charity" I find myself thinking - yeah right, followed by a series of wonderings - how much are they donating - why does no one say exactly HOW MUCH? I mean, if they're donating the price of a box of 20 Christmas cards from superdrug, that'll be £2.99 then (tight arses). Or would that include the price of 20 first class stamps, so £14.99 now) ? And which charity are they supporting? Why don't they tell us? Why the big announcement without any more detail? You see - I might have been thinking the same and I might want to support the same charity as you...

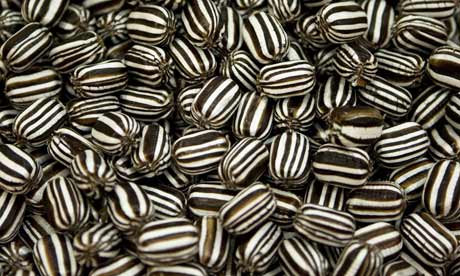
http://static.guim.co.uk/sys-images/music/Pix/pictures/2009/6/9/1244541785988/Humbugs-001.jpg

The other thing they could do is buy charity Christmas cards and hand deliver them (If they didn't want to pay for stamps) - that way you *can* still support your chosen charity and spread a bit of Christmas cheer to people you're not always in touch with or wouldn't normally buy a gift for.

But if you do decide that you're definitely *not* doing Christmas cards then, I'd like to see someone saying this:

I'm not sending Christmas cards this year, but instead I'm donating £25 to a friend's JustGiving page (raising money for Cancer Research) - and if you think this is a worthy thing to do, don't just LIKE this post, visit their page and make a donation too [enter URL of JustGiving page here].
PS, I lied about not sending Christmas cards, I'm doing that as well.

One of those things that women don't talk about

According to some etiquette thing you can't ask a woman her age or her weight, and if you asked her she'd probably slap you, and certainly wouldn't tell you.
But I'm one to go against the grain (sometimes) and I've decided that it doesn't matter who knows my current weight. It's only a number and it doesn't tell you what size clothes I wear or how fit I am (or aren't).

I had a (stillborn) baby in June and as part of the pregnancy process I put on weight. In July I decided that before I got pregnant again I'd get myself in the best shape ever and decided to start with my weight.

I wanted to get back into normal (non-maternity) clothes, because wearing maternity clothes made me feel depressed, a constant reminder about what had happened and I kept thinking: I wasn't pregnant so shouldn't be wearing maternity clothes.
 
http://www.nlm.nih.gov/medlineplus/images/scalefoot.jpg

My first weigh in was: 

16th July and I weighed 86.1kg. I have been heavier (when I was younger) but I couldn't be sure how much I weighed then, I was probably on the cusp of being a size 20.


I used 2 apps on my phone:

Libra - to record weight
My Fitness Pal - to record food consumed

Here's what I did:

  • I weighed myself every weekday (probably a bit too obsessive).
  •  I reduced my portion sizes.
  •  I changed in between meal biscuits/cakes for fruit.
  •  I took up regular exercise (back to netball & spinning)
  •  I drank more water
  • I monitored what I was eating and how much (using My Fitness Pal


My goal weight:

My goal was 78kg (last known pre-pregnancy weight) and I wanted to be there by 7th December.
On  Wednesday 18th December I reached my goal weight. 78kg, I'm a bit late but I'm there.

And?

  • I feel fitter.
  • I am back in all of my normal clothes (some are too big now).
  • I am still a bit wobbly in places and could do with toning up.
  • I'm glad I reached my goal without any crash/faddy dieting (meal replacement, counting sins/syns, points, starving myself, on/off days).
I've let myself enjoy Christmas & New Year and will be back to spining and netball in the New Year (w/c 6th Jan)

Sunday, 22 December 2013

Pigeon Loft Cake

This post is incredibly overdue, but it's here at last - better late than never (just in case you want to know how to make a pigeon loft cake for a friend this Christmas!)


My brother Matthew (or Corny to friends) is into pigeon racing. My brother turned 30 on 31st December 2012. Yes, he's young and yes he enjoys pigeon racing. He's been doing it since he was about 10 and has done very well, he's made the national pigeon racing magazine, British Homing World and the envy of my allotment neighbour, John, who also races pigeons.  He often tells me he's seen Matthew in the paper, and most of our conversations tend to be about pigeon racing, despite the fact I don't really know much.

Matthew's pigeon lofts (yes there are 4 of them) in my parents garden and he's been encouraged and supported by them over the years.

When Matthew's wife Nichola asked me to make him a cake for his 30th, I didn't need any persuasion I knew exactly what I'd make, a pigeon loft, modelled on one of his own.

One of my brother's pigeon lofts
I took a picture of one of his racing lofts (the prettiest looking one actually) - drew it up on paper and then planned how I'd make it out of edible loveliness.


My pigeon loft cake plans

The final cake would sit on a board approx A3 size and the cake would be plain sponge glued with homemade raspberry jam and buttercream and then covered in coloured icing and other sweets.

I also included a little dog, my attempt at a Jack Russell (if you couldn't tell) my brother's dog which lived near the pigeon lofts, he died in summer 2011 but he has a place up there.  And I made a poor attempt at some pigeons.

I'm rubbish at making people and animals, I attempted to make the dog twice, the 2nd version is bigger than this and still sits on my mum's kitchen windowsill. My friend Kate, Cakepoppins also make some pigeon cakepops which weren't part of the cake decorations but we're handy to give to the smaller children who came to the birthday meal we had on New Years Eve.

Building a pigeon loft out of cake:

Stacking & sticking with jam and buttercream

 The main loft was just made from rectangular cakes stacked, stuck together with jam and buttercream and then cut to form the sloping roof and the entirely covered in buttercream and then chilled overnight.

Then the roof beams (mint matchmakers) and the wooden panelling added (brown icing with lines printed in them, and then hung.


The roof was added (a piece of grey icing) and the rest of the sides done in 'wooden panelling'

The side panels were slightly longer than the sides of the cake, and on the front I didn't panel all of the front - as I needed to include the doorway.


As you can see the doorway was done with black icing and I cut out 3 windows too.


One pigeon loft with crazy paving


The front of the loft was done in a lovely grey concrete slab (excuse my irregular slabs - and I'm sure my brother would have a thing to say or two about how I've laid them too - he's also a bricklayer)


 The aviary bit on the side was the next bit and done with gelatine sheets and a mint matchstick frame - I'd made a couple of random looking pigeons and decided to put them in the aviary too.


Credit to Mr Lisa who did the aviary bit
As you can see - these are Mr Lisa's arms/hands in the way here - mainly because he was in charge of the construction of the aviary, it was a bit fiddly and done with melted chocolate fusing the frame and gelatine together - plus he likes mint matchsticks so ate the leftovers.


Also we added some more matchsticks to the roof - to replicate the little fence that's up there (i think it's supposed to stop the pigeons landing on the roof?)


And then to finish it off I surrounded the rest of the loft and aviary with grass and flowers and pigeons and the dog.

Th finished pigeon loft cake & handmade card by http://britthub.co.uk/


As you can see, the Jack Russell and pigeons are far too big.


Friday, 20 December 2013

Christmas gift buying stress

I sometimes seem to get myself all in a tizz about buying Christmas presents.

I decide who I need a present for, think of something suitable, find something appropriate and then immediately doubt and question my actions:

Will they like it? What if they don't
Will someone else be buying this for them? So should I still get it?
Do they actually *need* this? I don't want to buy them something that they've already got or don't want.

I don't suppose I'm the only one to think like this, but it gets me down, wears me out and knocks my confidence.

And then I lose the sense of excitement I normally feel about Christmas and I go all 'bah humbug' and think, oh just fuck it, if they don't like it they'll get rid of it, if they've already got one then it's their problem.

I need some words of reassurance or words of wisdom to help me change my way of thinking about this and not let the buying of Christmas presents stress me out and make me unhappy.

Sunday, 15 December 2013

Needle felting- beyond the class

I bought some needles and wool for needle felting, because I loved it so much (see previous blog post), and I decided to have a go at home.

I've made 2 things since the class.

The first was a fine moustache, similar to Fairfax/Carstairs (the British Airmen from 'Allo 'Allo) and the second item was supposed to be a rabbit, but it might be a mouse now - I haven't decided yet.

Wednesday, 4 December 2013

Made Cafe Class: Feeling Felty - my favourite class yet!

A few weeks ago I attended the Feeling Felty class, held at Made Cafe Whitley Bay, the last time the class ran must have been a good 6 months ago, I've been dead keen to try it since seeing the creations from the previous class and I like birds - and decided that I wanted one for my house (as a pet).

I've always had a thing for birds, when I was growing up my dad had an aviary and kept budgies, doves, cockatiels, finches and canaries and we had birds as family pets; a budgie called Brian, a cockatiel called John, we nursed a baby cockatiel for a few weeks called Percy.  Even now, my dad and brother race pigeons and dad has chickens.  I have an ornament-budgie as my office-desk companion and I would love to have chickens (I currently have 2 carboard cutouts in the house) and I'd like to have a pet  Myna bird (who I'd call him Verloc).  And I am a bit of a twitcher (I used to be a member of the Young Ornithologists Club with the RSPB).

Back to the class.

The class was led by a lady called Carolin from Birds in the Attic and Feltwerk she provided us with all the equipment we needed to create a needlefelted bird.

There were 6 on the class and no one had any real experience of needle felting before.
Carolin talked through the process of needlefelting and creating basic shapes.
We made a Christmas pudding decoration first (pic at the end) which helped us to get the basic technique of stabbing the barbed needle through the wool, creating shapes and adding layers of colour - everyone created their own unique take on the Christmas Pudding.

And then we were ready to create our birds - and staying with the Christmas theme we chose to make robins.

We had a couple of pictures of robins on the table to work from (if we wanted), but essentially we could make them how we wanted.  I was keen to make a 'real' looking bird so made sure I kept checking with the pictures on the table.

A ball of un-spun wool

So here's how my robin (now called Steve) was made....


We began with this 'uncarded wool batt' which looked like a cross between the stuff you get out of your hoover/tumble drier and belly-button fluff.  It was actually un-spun wool- the stuff that people would turn into wool using a spinning wheel.  We were also advised that it wasn't merino wool, because apparently merino wool is quite hair-like and a bit different to work with.

Carolin gave us two different sized (ever-so-sharp) needlefelting needles to work with and talked through the process of getting started, which was all incredibly simple. 

Watch the birdie
Then we all fell silent, stabbing the wool and creating the birdiness, the head, the wings and the back - leaving the tail until the end.  We were all engrossed, in flow, as they say - and loving the transformation, turning a bouffant of wool (akin to my hair when i let it dry naturally) into a smooth, tight, defined shape that began to resemble a bird.


The fiddliest part of the course was creating the legs - from copper wire, and everyone seemed to struggle a bit, not as easy as Carolin made it look.  Adding the the legs to the body was easy - just needlefelt them in place (no sewing, no glue).

Once the base colour had been needlefelted we then added other colours in thin layers, the white breast colours, the tell tale red breast, the dark-brown head and back.

We were all absorbed in the activity, and nearly didn't stop for a cuppa, but we did.  Jeannie brought a plateful of delicious cakes to nibble on (all part of the workshop). 

Teabreak over, we worked on: thinned, shaped, needlefelted and cut the tail into shape, finished off with eyes (needlefelted) and beak (yes, needlefelted too) and he was done. 

Oh hang on, I just need to tinker with it a bit more...
and a bit more....
and a bit more....

And now he was done.


Steve the robin
 And here he is with the other robins that were made on the day, as you can see everyone's was completely different.


It was a lovely craft to learn how to do and I thoroughly enjoyed getting lost in it, it's definitely something I'd like to do again, and I've already been researching googling where to buy supplies from, and listing what I'd like to make next: a pigeon, a blue macaw, a rabbit, a snowman and a cat (for my auntie).  Oh and here's that Christmas Pudding (it's a Christmas tree decoration).


Steve is now living nesting on the mantle piece in our living room - I'll give him a stroke and say hello to him every day.  I love Steve.